Pair and configure the Pet Tag with the mobile appUpdated 5 months ago
After installing the Pet Tag receiver, the next step in preparing your Wayzn Pet Tag is to pair the system with the Wayzn mobile app. This article provides step-by-step instructions.
Contents:
Accessing the tag settings page
Setting up a Wayzn Pet Tag
Step 1
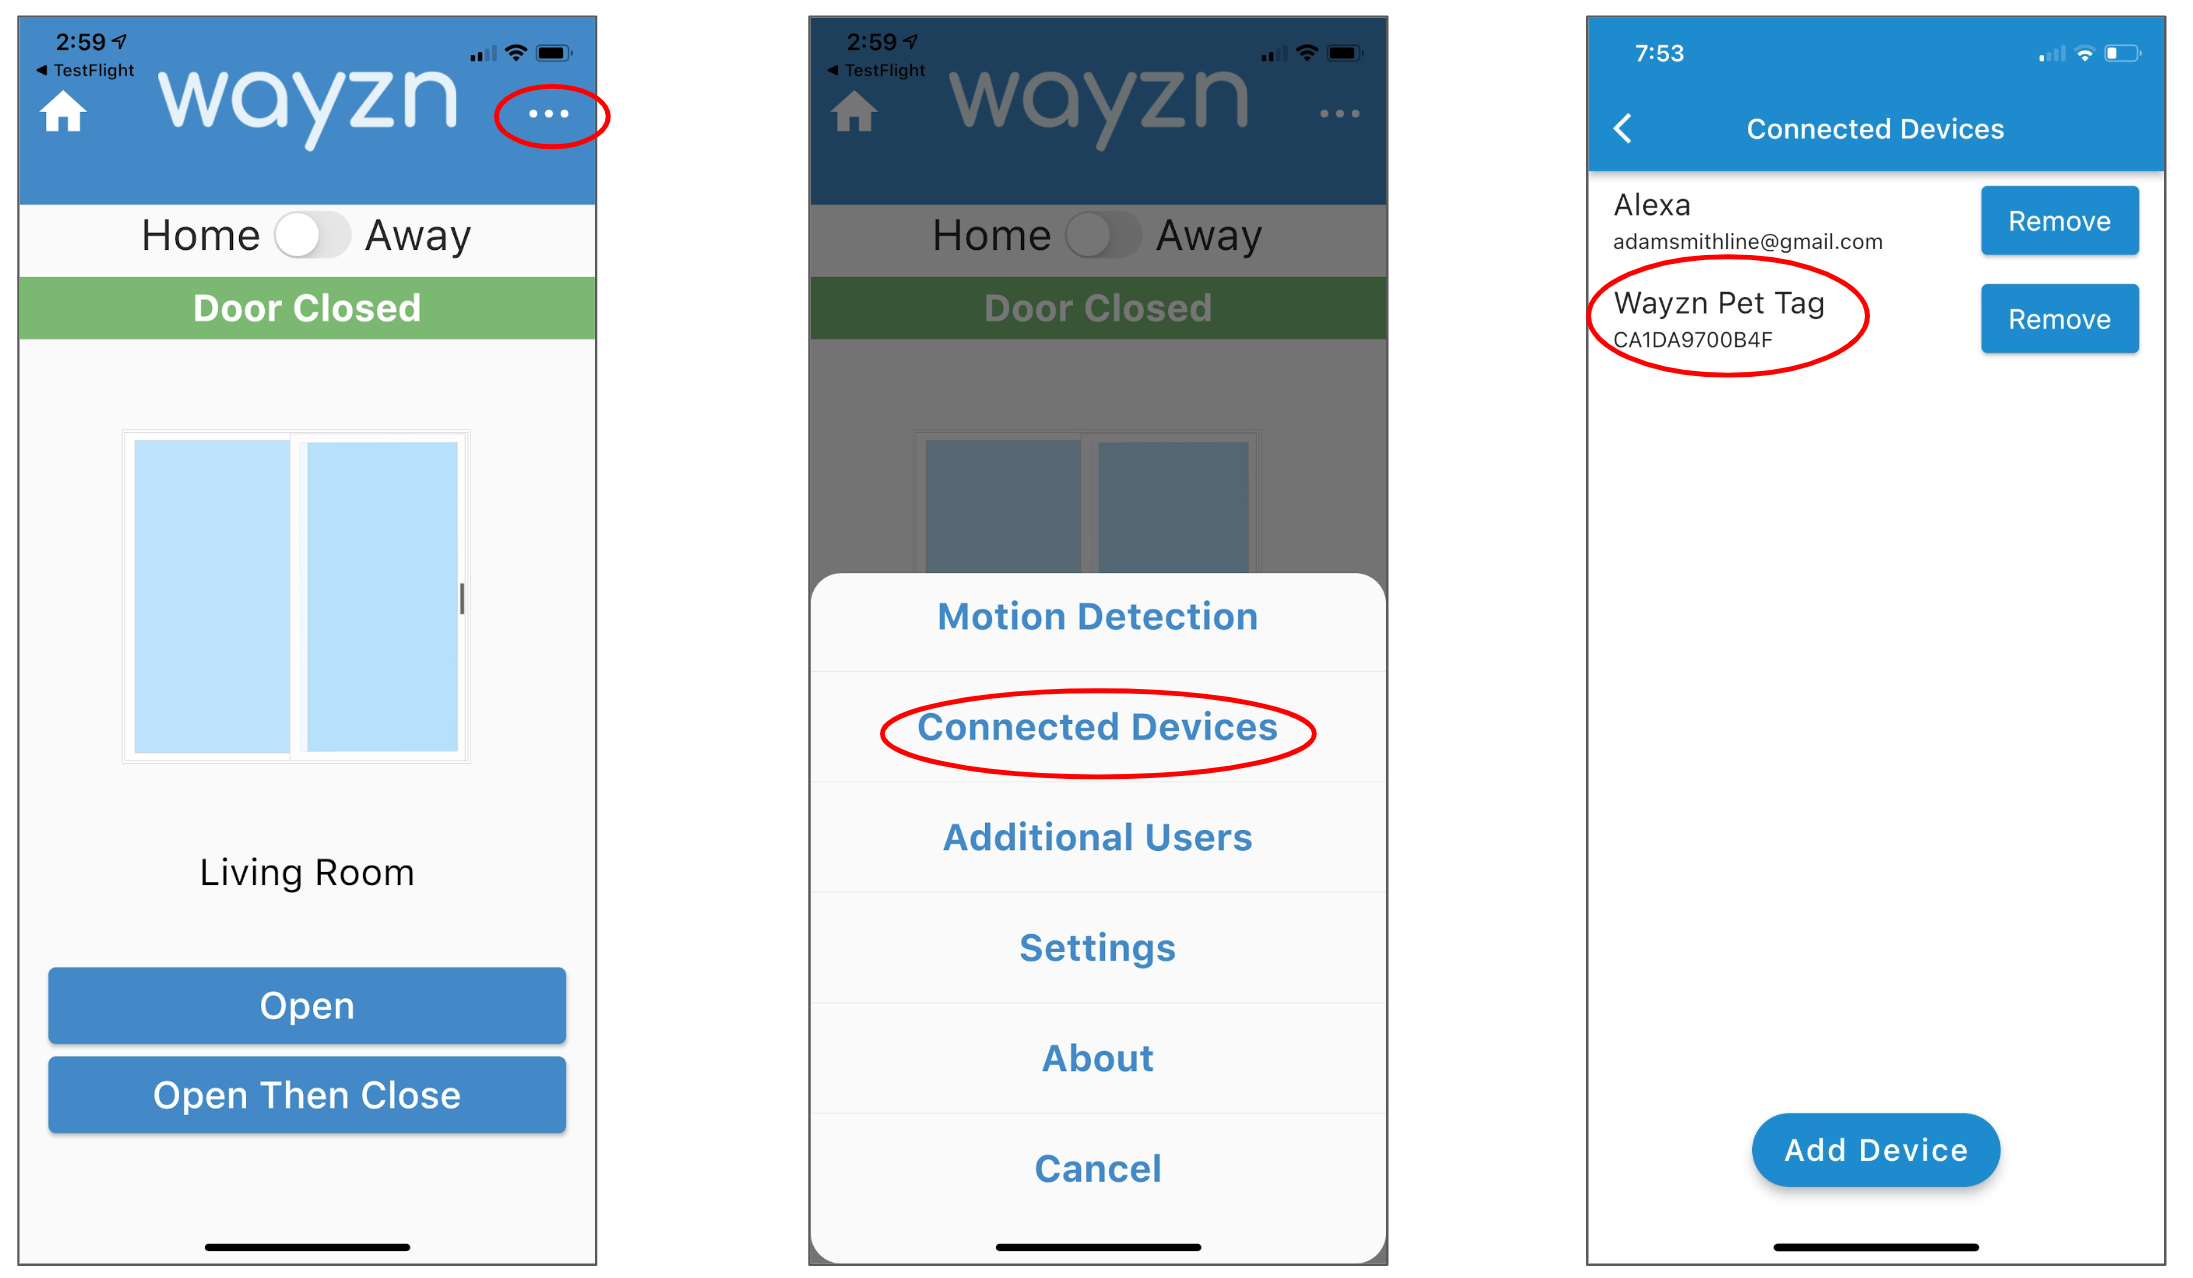
This step must be completed by the primary user, as only the primary user can add and manage connected devices such as Wayzn Pet Tag and Alexa. To begin, on the home page, select the tile for the Smart Pet Door that operates the door where you installed the Wayzn Pet Tag receiver. Once on the device page, use the ellipsis in the upper right corner to access the menu, then select "Connected Devices".
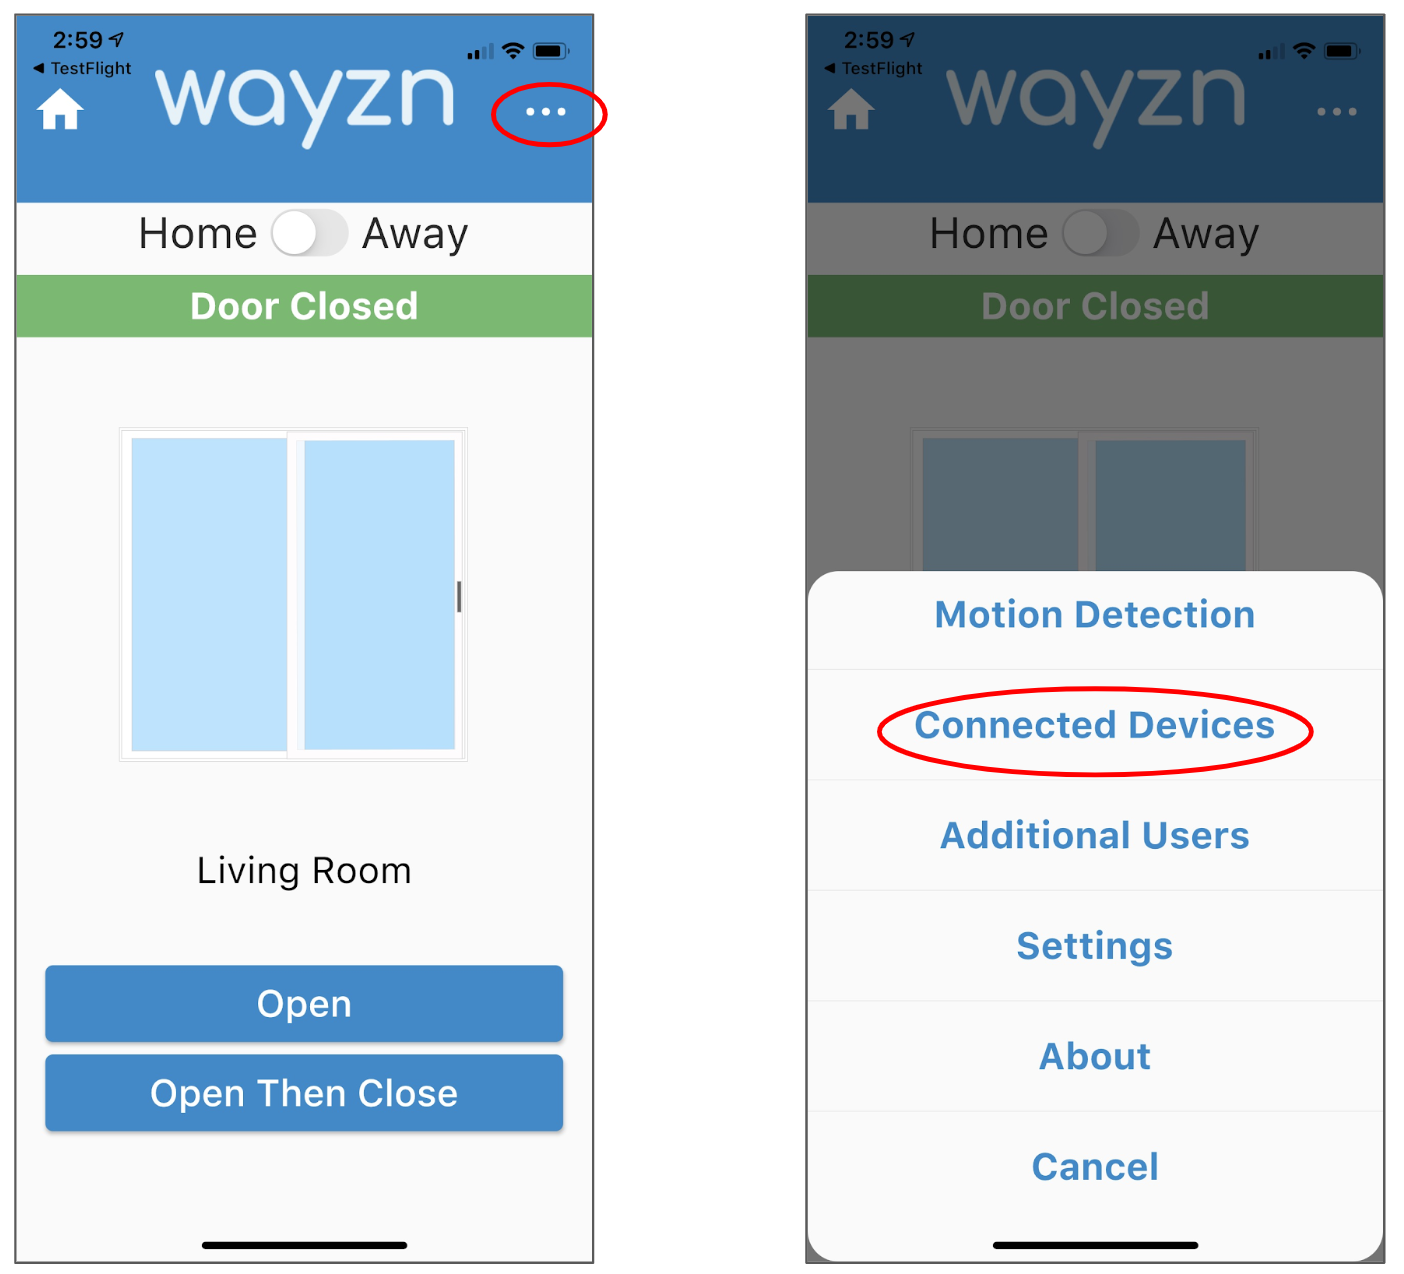
Step 2
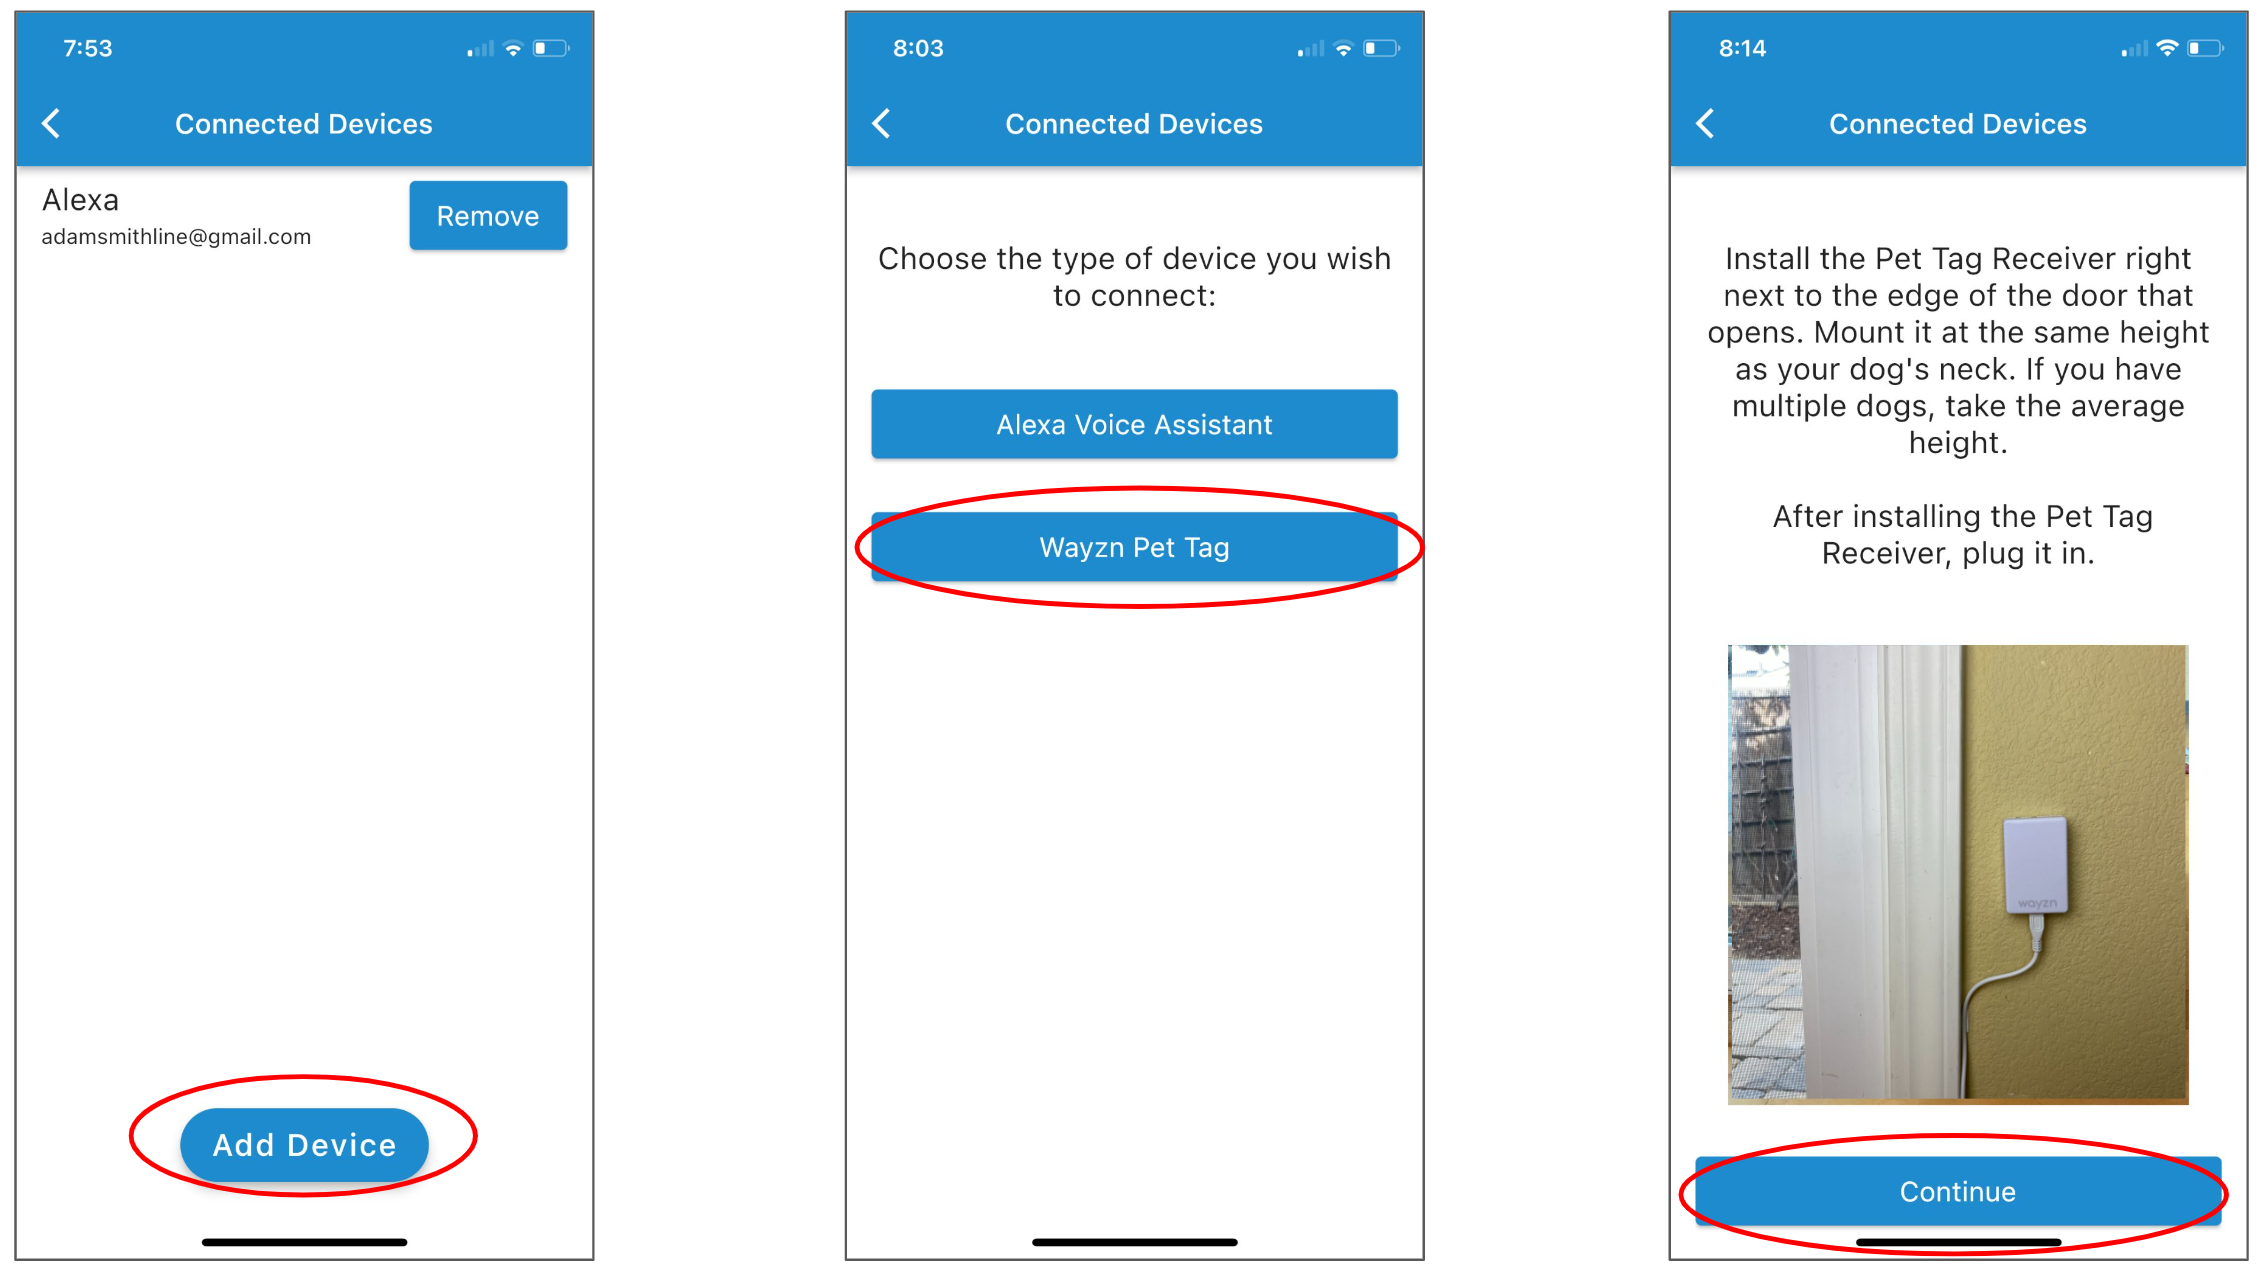
Select "Add Device" to see the list of possible devices, then select "Wayzn Pet Tag". If you've already installed and powered your Wayzn Pet Tag receiver you can select "Continue" to proceed.
Step 3
Before you can add your first tag you must activate the receiver. To activate the receiver, hold the button on top of the receiver until the light on top of the receiver turns blue. After a slight delay the app will take you to the next step.
Note: This receiver activation step is only required when adding your first tag, and the app will automatically bypass this step when adding additional tags.
Step 4
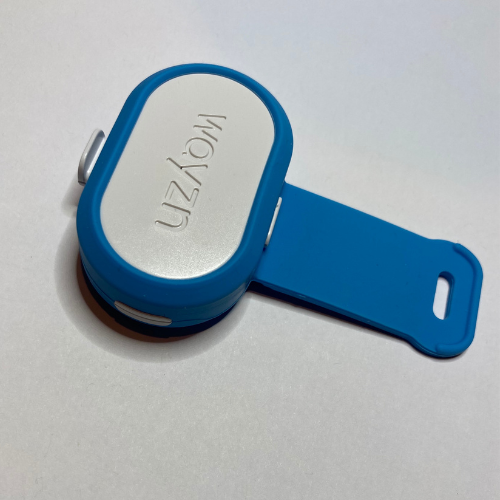
After your receiver is activated, the app will prompt you to insert the supplied battery into the tag. Inserting the battery puts the tag into pairing mode for 30 seconds. If you have previously inserted the battery, remove it and re-insert it now to place the tag into pairing mode.
To remove the tag from the strap, gently stretch the strap to release the posts on all four edges until you can pull the tag from the strap.
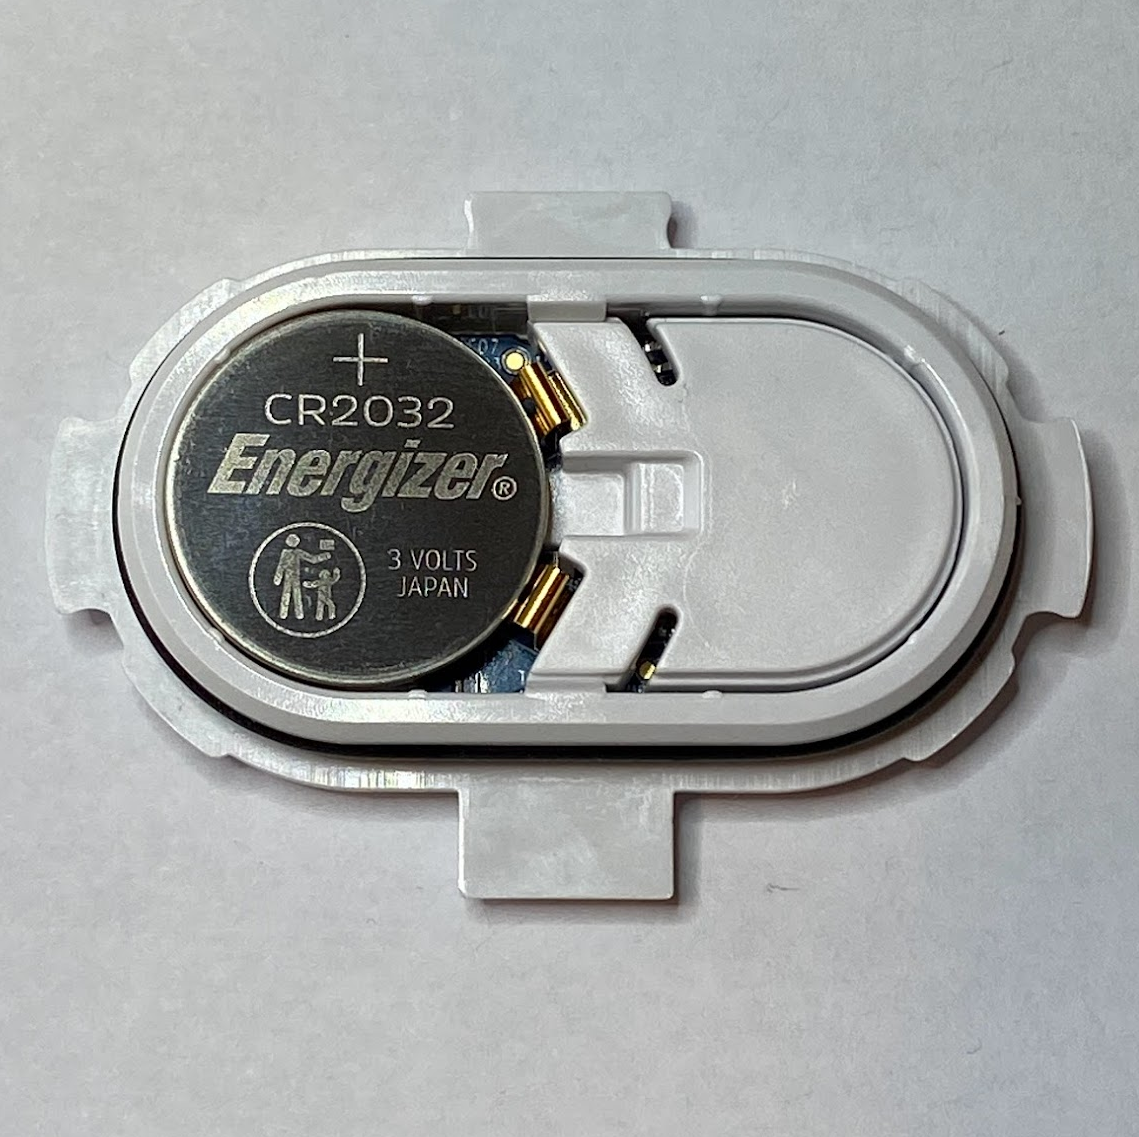
Once the tag enclosure is removed from the strap, open it by using your fingernails or a small screwdriver to separate the two halves. Start at one end and work your way around the enclosure in circles until the enclosure opens. Insert a new CR2032 battery into the battery compartment with the plus sign facing you as pictured.
Step 5
After installing the battery, replace the enclosure cover so that the long post of the enclosure base and the long post of the enclosure cover are aligned with one another. Apply gentle sideways pressure on the cover as you press down to remove any air. Continue gently working the two halves of the enclosure together until you achieve a snug fit with no gaps along the seams.
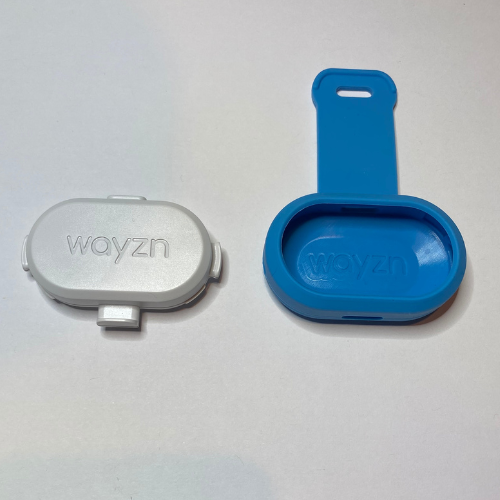
Next, re-insert the tag into the tag strap. First, make sure the logo on the inside of the strap and the logo on the enclosure are both facing you and oriented the same way, as pictured.
Then insert the tag into the strap, starting with the long post at the bottom of the tag, as shown.

Finally, stretch the strap around the edges of the tag until the remaining posts sit flush with the outside of the strap as pictured here.
Step 6
After checking for new firmware the Wayzn app will notify you that your tag is ready for use. Select "Continue". You will be taken to the tag settings page. You can return to the tag settings page anytime from the Connected Devices page by clicking on the name of any added Wayzn Pet Tag. Once on the tag settings page you can rename your tag, adjust the tag's responsiveness, and check the health of the tag's battery.
Give your tag a name
If you plan to have multiple tags in use, you can give each tag a unique name. This will make it easy to differentiate one tag from another when setting responsiveness or monitoring battery health. To name a tag, click the Rename link in the upper right of the screen. When prompted, enter the desired name and click Save.
Adjust your tag's responsiveness
The Responsiveness slider controls how responsive the receiver will be when detecting the tag nearby. You can adjust the responsiveness for each tag individually. Moving the slider to "Low" will require your dog to sit or stand near the receiver for more time before the system responds, thus reducing the likelihood of the door opening when the dog is simply passing by. It may also require your pet to move slightly or even approach the area more than once before it is detected. Moving the slider to "high" will make the system respond faster but will increase the possibility of the door opening when the dog is simply passing by. Note: This setting may take time to reach the receiver, so changes may not take effect immediately.
Monitor your tag's battery health
The health of the tag battery is shown at the bottom of the page. This information is updated within two minutes after a tag detection occurs. If the battery health meter shows red it means the battery should be changed immediately. Follow these instructions for changing the tag battery.
If a tag is detected by the receiver and determined to have low battery health the Wayzn mobile app will provide a notification to your phone (if you have the Wayzn app closed or in the background, and you have allowed notifications in the app settings).
Before using Wayzn Pet Tag, please follow the link at the bottom of this page to learn how to correctly position and attach a tag to your pet's collar.
Reduce Repeat Detections (If desired)
You can enable the Reduce Repeat Detections feature if your door is opening and closing repeatedly. When enabled, a tag can be detected once, after which it will be ignored until it leaves the area for at least 30 seconds before returning.
Accessing the tag settings page
You can return to the tag settings page anytime. To begin, in the Wayzn app on the home page select the Wayzn device associated with your tag. Once on the device page, use the ellipsis in the upper right corner to access the menu, then select Connected Devices. Click on the name of the tag to access the tag settings page for that tag.
Adding additional tags
If you have more than one pet, you can add up to 8 pet tags per Wayzn Pet Tag receiver. To add an additional tag, on the Connected Devices page click on Add Device. When prompted to choose the type of device, select Wayzn Pet Tag. If you already have a Wayzn Pet Tag receiver configured, the Wayzn app will prompt you to insert the supplied battery into the tag. Follow the same procedure you did in Step 4 above to finish adding your additional tag.
After pairing and configuring your tag(s), the next step is to learn how to correctly position and attach a tag to your pet's collar.