Install the Pet Tag receiverUpdated 6 months ago
Before installing and using Wayzn Pet Tag, please take a moment to review the Wayzn Pet Tag Quick Start Guide if you haven't already done so.
WARNING: OPENING AND CLOSING DOORS REMOTELY CAN BE DANGEROUS.
USE OF WAYZN PET TAG, EVEN IN HOMES WITH SECURE YARDS, INCREASES RISK OF INJURY AND REDUCES SECURITY. THE SAFEST WAY TO USE WAYZN WHEN AWAY FROM HOME IS TO FIRST CHECK THE AREA WITH A CAMERA BEFORE USING THE APP TO OPERATE THE DOOR.
DOOR AUTOMATION IS NOT RECOMMENDED FOR HOMES WITH POOLS, SMALL CHILDREN, SMALL PETS, OR YARDS THAT ARE NOT SECURE. PLEASE USE CAUTION AND CONSIDER THE RISKS BEFORE CONTINUING TO IMPLEMENT ANY FORM OF AUTOMATION.
Wayzn Pet Tag consists of multiple parts: the receiver and one or more tags. Each of these components must be positioned correctly for the system to work properly. This article explains how to attach and position the receiver. After installing and setting up the receiver you will want to learn how to position and attach the tag.
Positioning and attaching the receiver
The very first step in setting up Wayzn Pet Tag is to install the receiver. For best results follow these guidelines:
Step 1 - Determine the best placement
The position of the receiver has a strong impact on the performance of the system, so it is important to find the best placement for your home. Since you may need to adjust the placement, we recommend that you use some masking tape to attach the receiver initially, then use the included mounting tape after you are sure of the best placement.
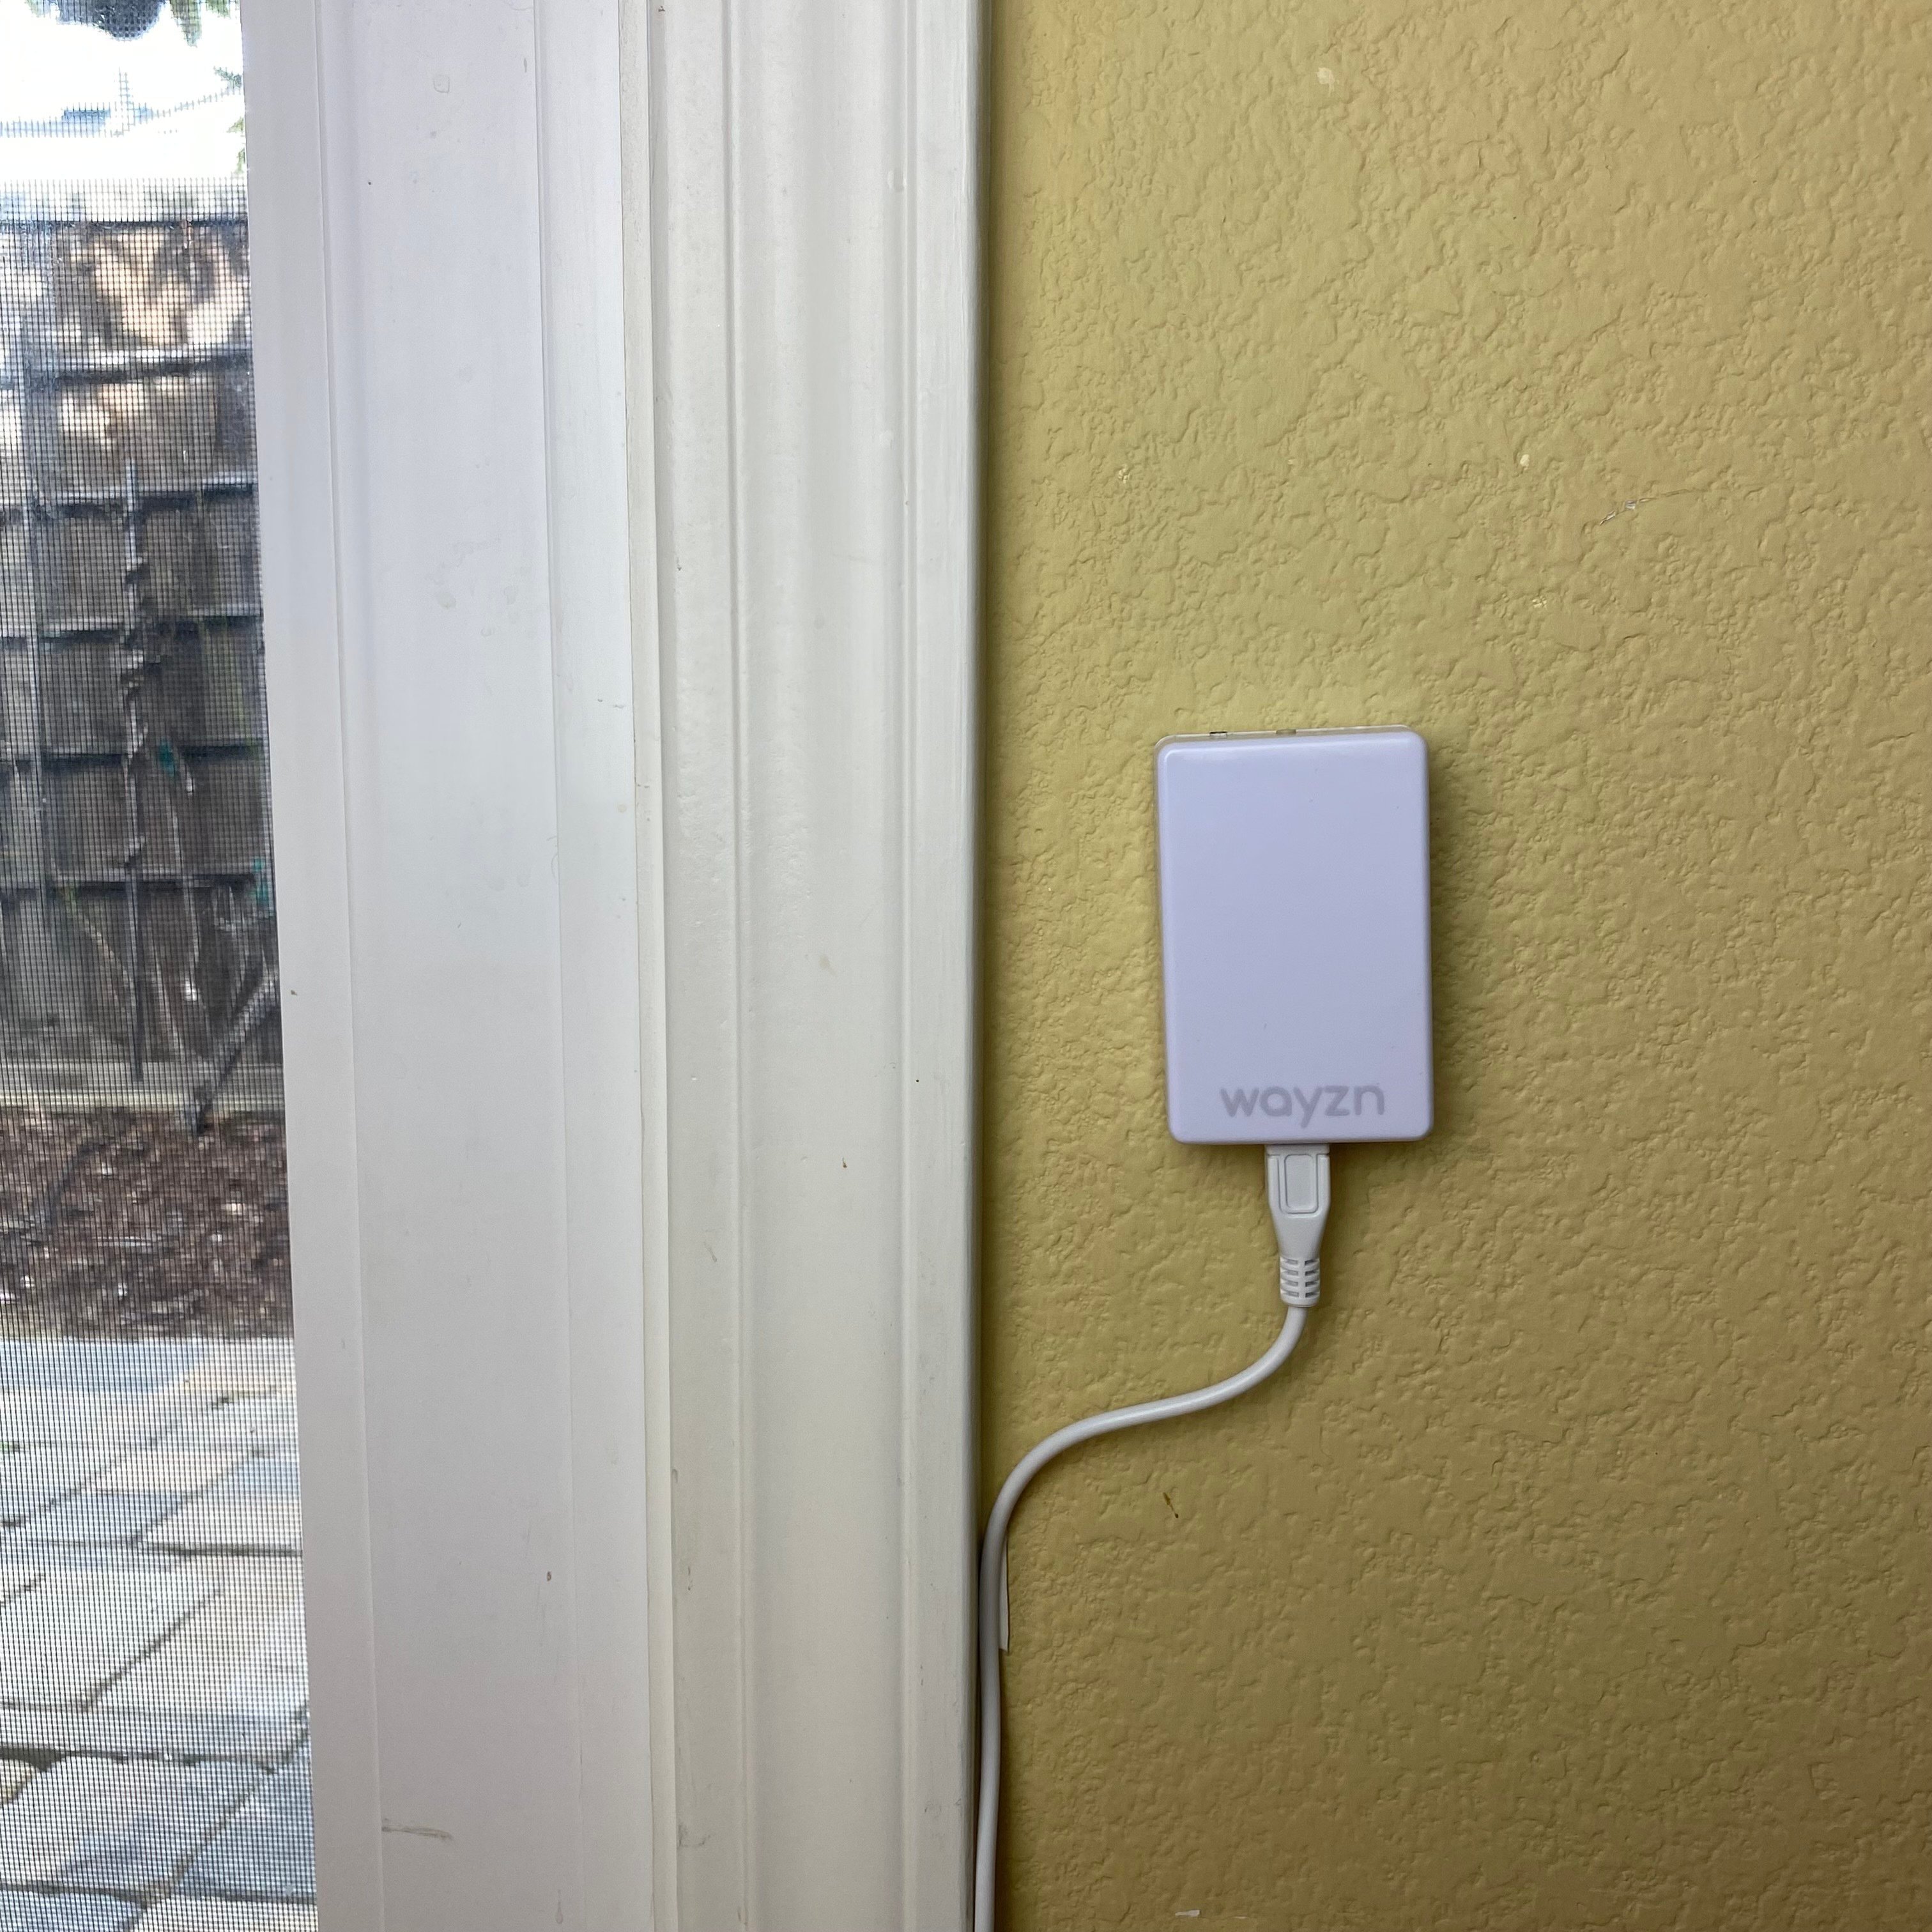
For most homes, the standard placement is best. This means the receiver will be positioned parallel to the door. Place the receiver flat on the wall near where the door opens, leaving 1-2 inches between the receiver and any raised trim or door casing, as shown below. Make sure the logo is upright facing you and the button and light are facing up toward the ceiling.
Position the receiver at or slightly lower than the height of your pet's neck. If you have multiple pets that will be wearing tags, try using the average height or a slightly lower height.
In some homes this standard receiver placement may not be possible. If your door is insert more than six inches beyond the wall, or there is no nearby wall space that is parallel with the door, you may need to use a perpendicular installation.
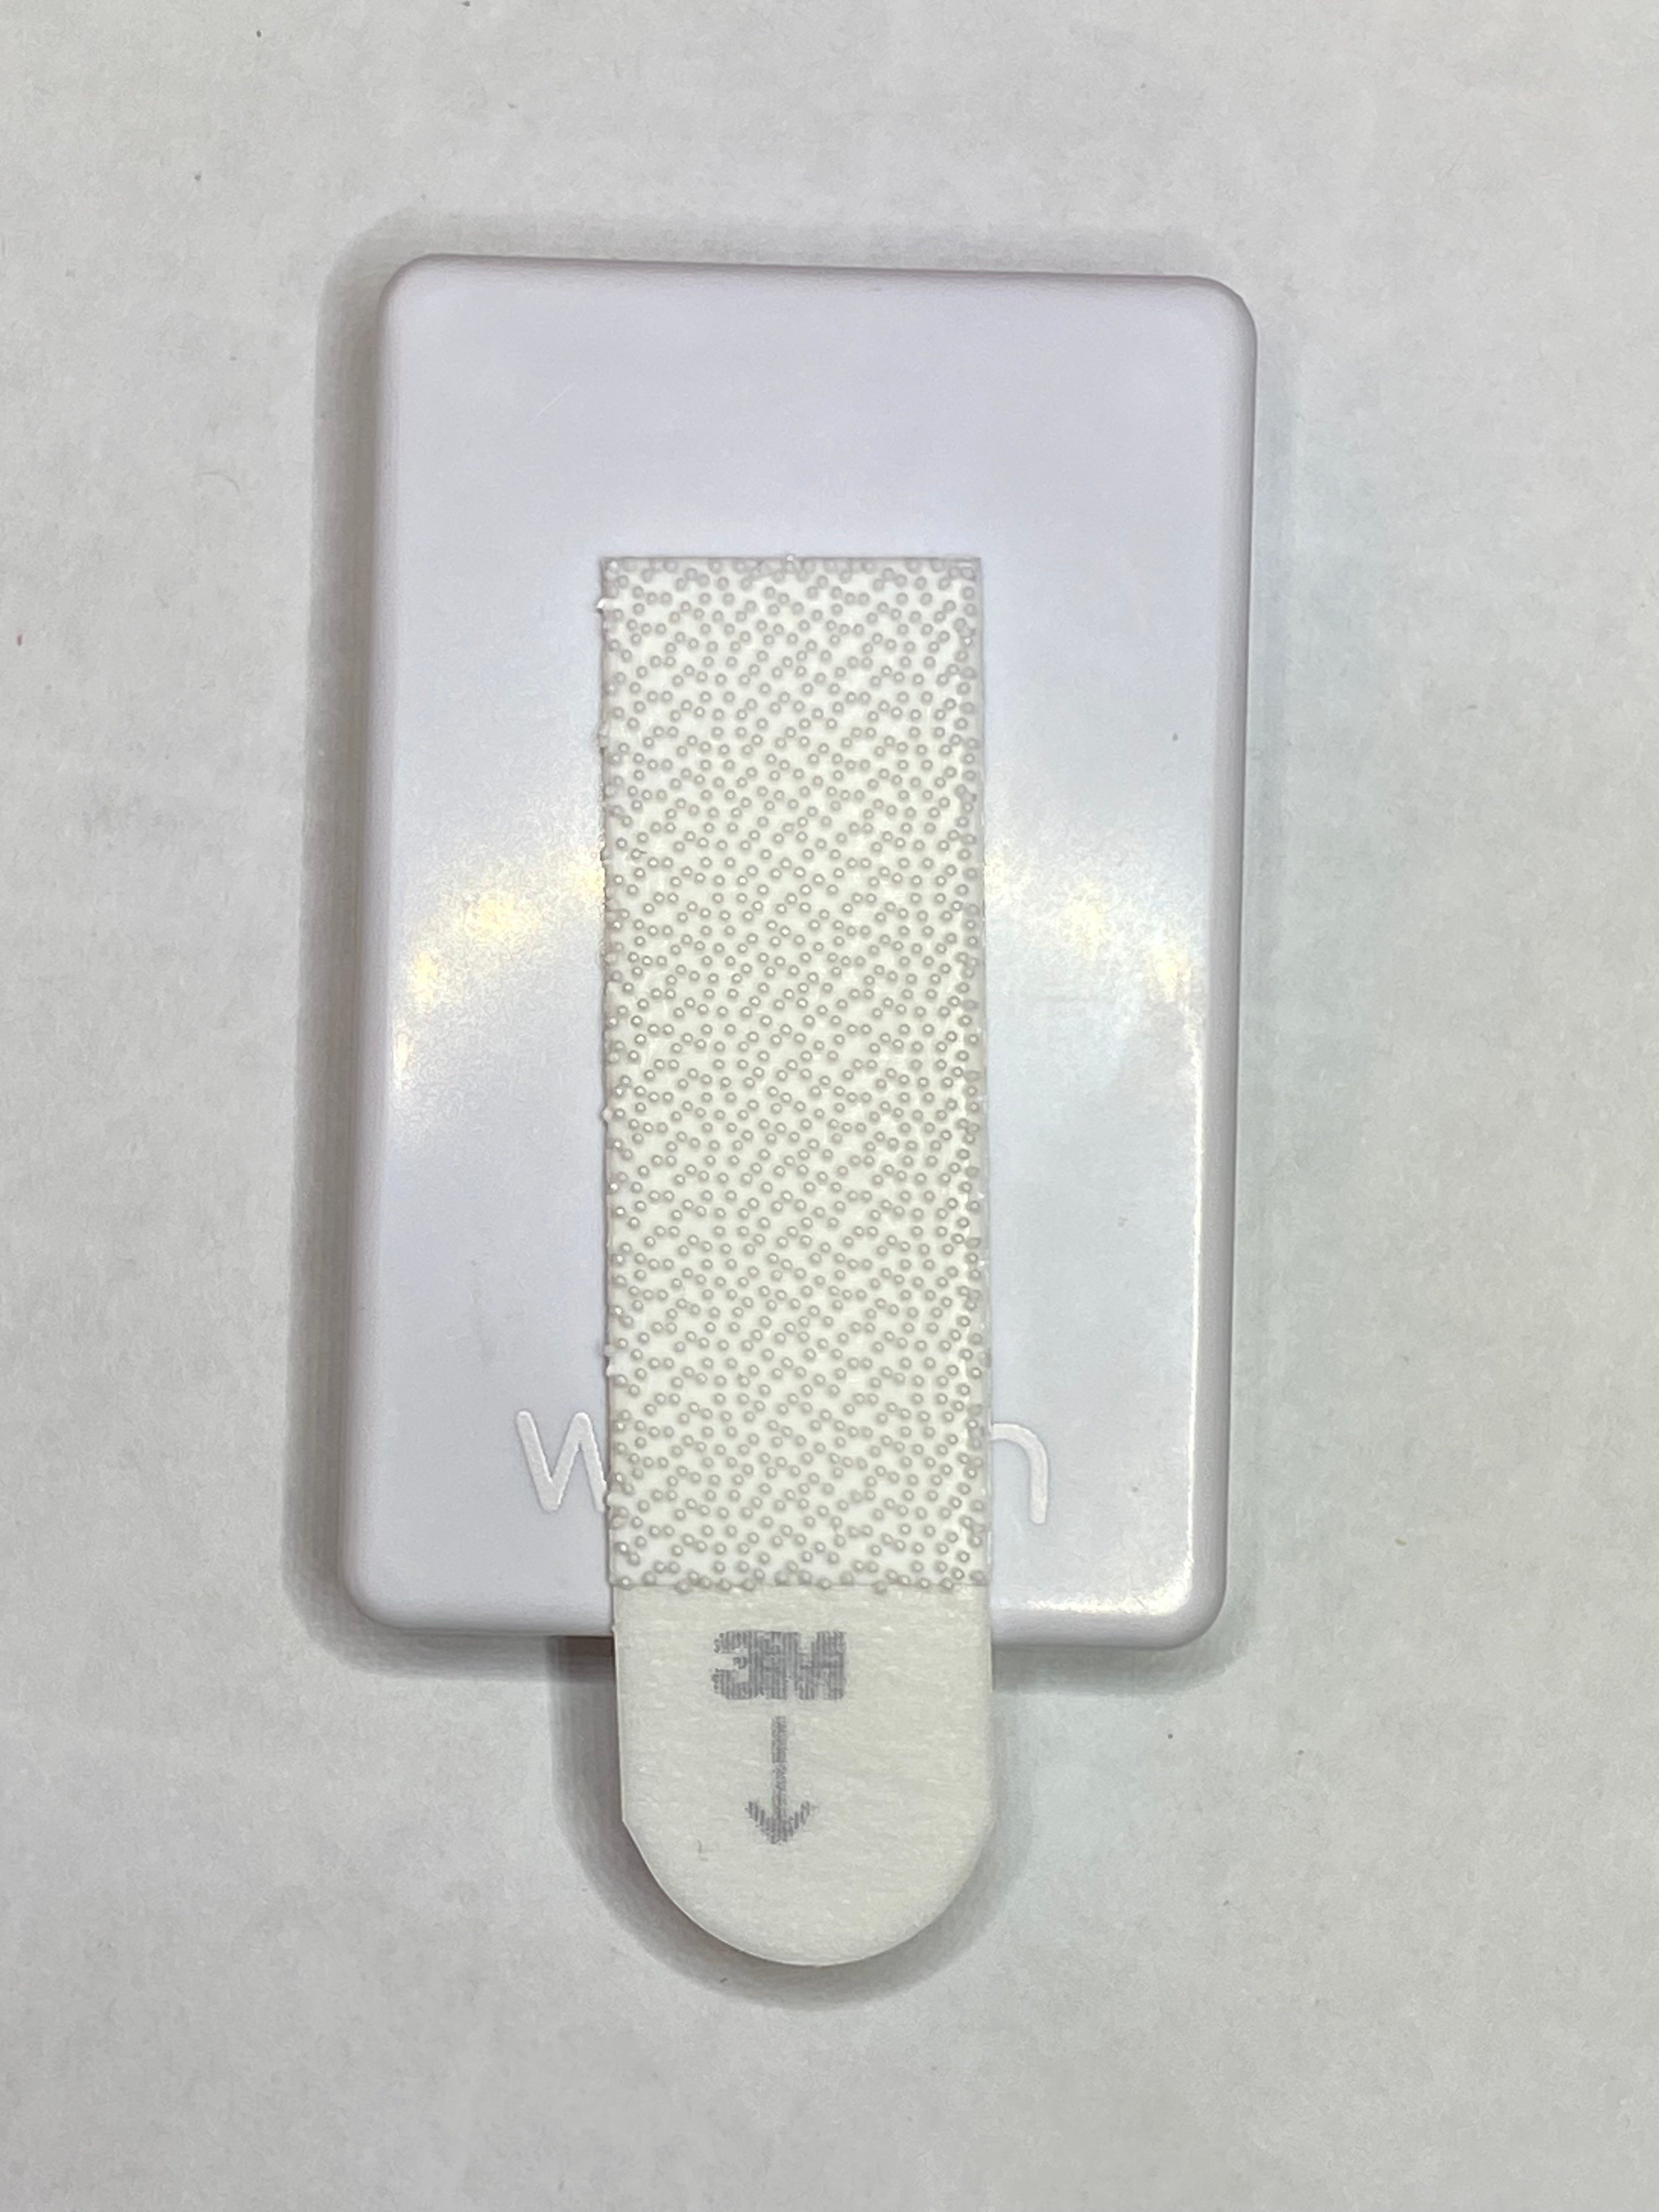
When using the perpendicular placement (i.e. mounting the receiver perpendicular to the door) it may be necessary to reverse the receiver so the Wayzn logo faces the wall, as shown below. Try it the normal way, and if you still can't achieve optimal results try flipping it and test again.

Step 2 - Stick it to the wall
Do not proceed with this step until you have tested various placements and determined the best placement and orientation of the receiver for your home.
The receiver comes with removable mounting tape pre-applied. As mentioned, refrain from using the mounting tape at this time, and use removable tape such as masking tape until determining the optimal placement.
If using a standard placement (i.e. parallel to the door) the supplied mounting tape will be on the correct side of the receiver and you can proceed to use it. Simply remove the backing paper to reveal the sticky surface of the mounting tape, then press the receiver into position and apply pressure for ten seconds.
If using a perpendicular placement you will need to relocate the included mounting tape before using it. Begin by separating the two strips by pulling them apart until the hook and loop mechanism releases. Then gently pull the tab on the piece of tape that is adhered to the receiver to elongate and stretch the backing until it releases from the receiver. Discard the tape you removed, then take the extra piece of tape included with your receiver and apply it to the logo side of the receiver as shown below. Finally, stick the two strips of tape together using the hook and loop fasteners, then peel the backing on the outer strip and stick it to the wall in the optimal position you discovered in step 1.
You can temporarily remove the receiver at any time by pulling it off the wall, being careful not to remove the tape that is attached to the wall (and your paint along with it).
Step 3 - Supply power to the receiver
Always use the plug and cable that were supplied with your Wayzn Pet Tag. Start by carefully inserting the Micro USB cable into the bottom of the receiver. Please note that this is a directional connector, so take care to ensure you have the connector oriented correctly before inserting it. Next, connect the other end of the cable to the plug, and plug it into the wall.
After installing the receiver and supplying power, follow these steps to pair the Pet Tag with the Wayzn mobile app.