Configure motion detectionUpdated 16 days ago
Contents:
What is motion detection, and how does it work?
Configuring the motion detection settings
What is motion detection, and how does it work?
Your Wayzn Smart Pet Door is equipped with a thermal motion detector behind the lens, just above where the rod exits the device. The motion (aka heat) detection feature adds an important layer of safety when used to detect heat when closing the door. It also provides the option to automatically let your pet out by detecting movement within an area you define just in front of your sliding door opening. It is important to configure your motion detection settings correctly in order to ensure the smooth operation of your Wayzn Smart Pet Door.
Note: The motion detection feature can be used to let your pet out, but it can't detect heat through the door to let your pet back in. You can let your pet back in manually by using the Wayzn app or voice commands with Alexa. If you wish to automate re-entry you can use Alexa routines or Wayzn Pet Tag as well.
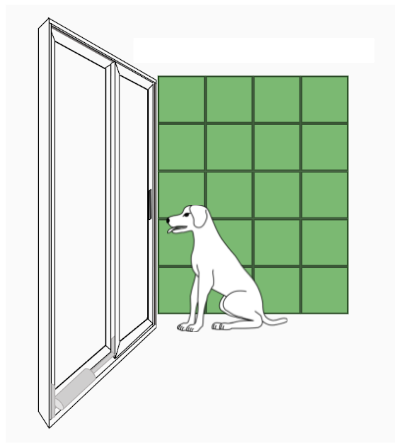
The Wayzn motion detector sees the area in front of your door as a grid. By adjusting the settings provided, you can finely control the size of pet that will trigger activity, the size and location of the observation area, and how motion detection will be used.
Configuring the motion detection settings
To begin, in the Wayzn app on the home page select the Wayzn device you wish to configure. Once on the device page, use the ellipsis in the upper right corner to access the menu, then select "Motion Detection".
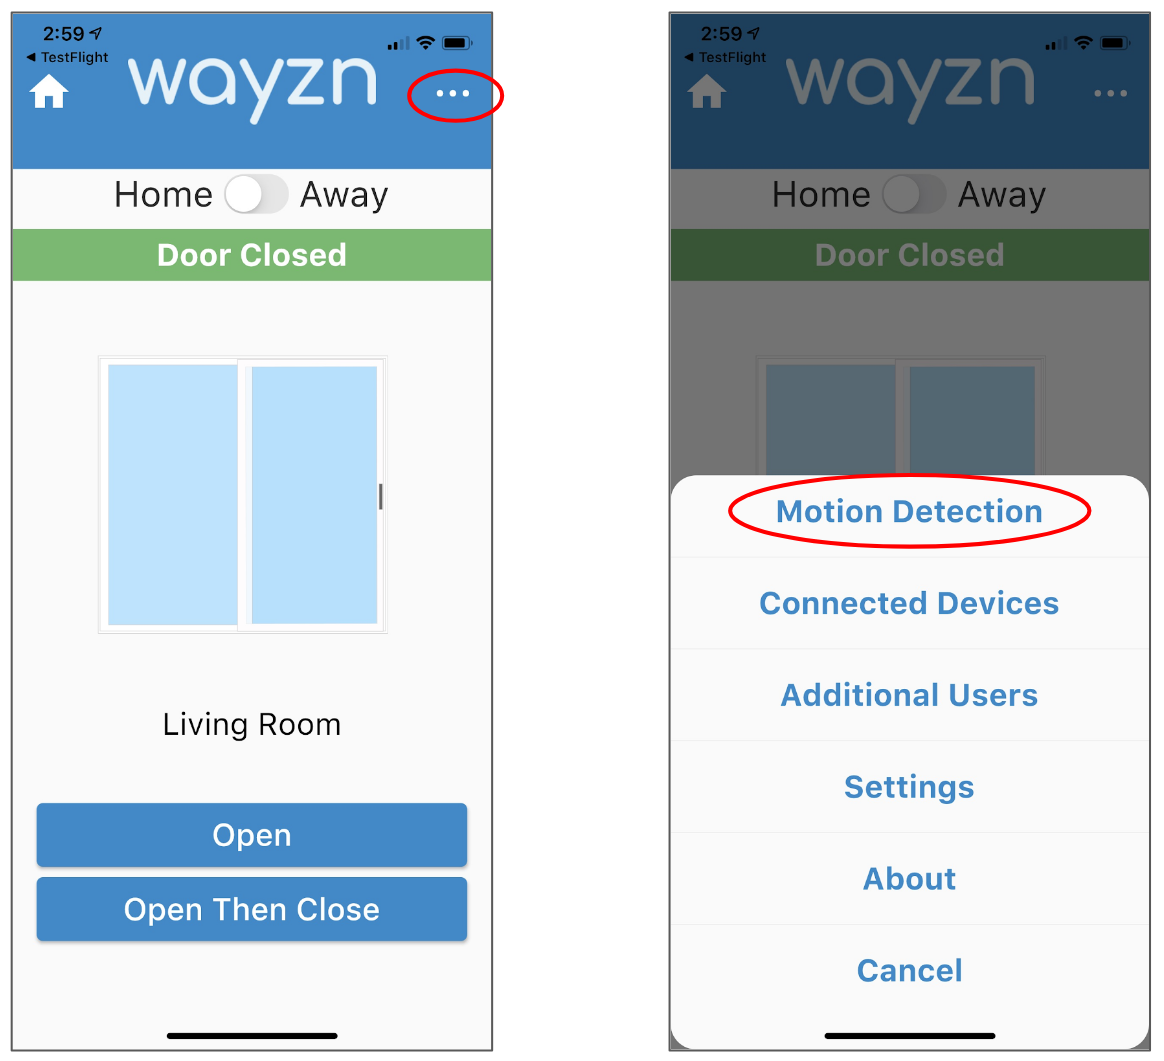
Next, carefully review and adjust each of the motion detection settings:
Dog Size
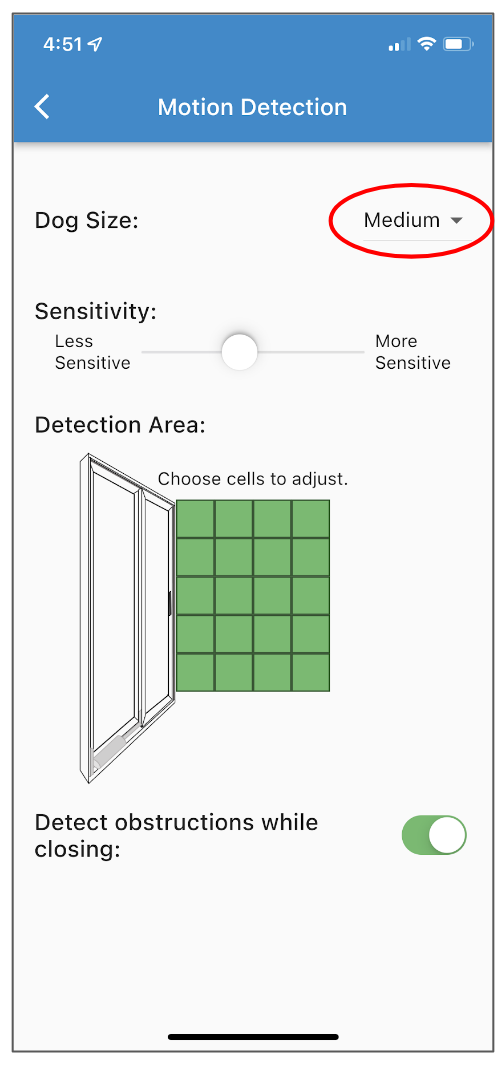
This setting controls how many contiguous cells in the grid must detect heat in order for Wayzn to respond. The Small setting requires only a single cell to detect heat before Wayzn responds. The Medium setting requires a cluster of two cells, and Large requires a cluster of four cells. By default, the Dog Size is set to Medium. Unless your dog is very small we suggest keeping the Medium setting because it will work for most dogs and it reduces the number of false obstructions.
Sensitivity
The Sensitivity setting determines how large a difference in temperature is required before a cell on the grid turns "hot". By default, the Sensitivity slider is set in the middle, and this setting should work best in most cases. If you have elected to use the Small Dog Size setting, you may need to reduce the Sensitivity slightly to reduce false motion detections. Similarly, if you elected to use the Large Dog Size setting, you may need to increase the Sensitivity slightly to compensate. In general, you should always keep the slider between 25% and 75%, and avoid settings very near either end of the range.

Detection Area
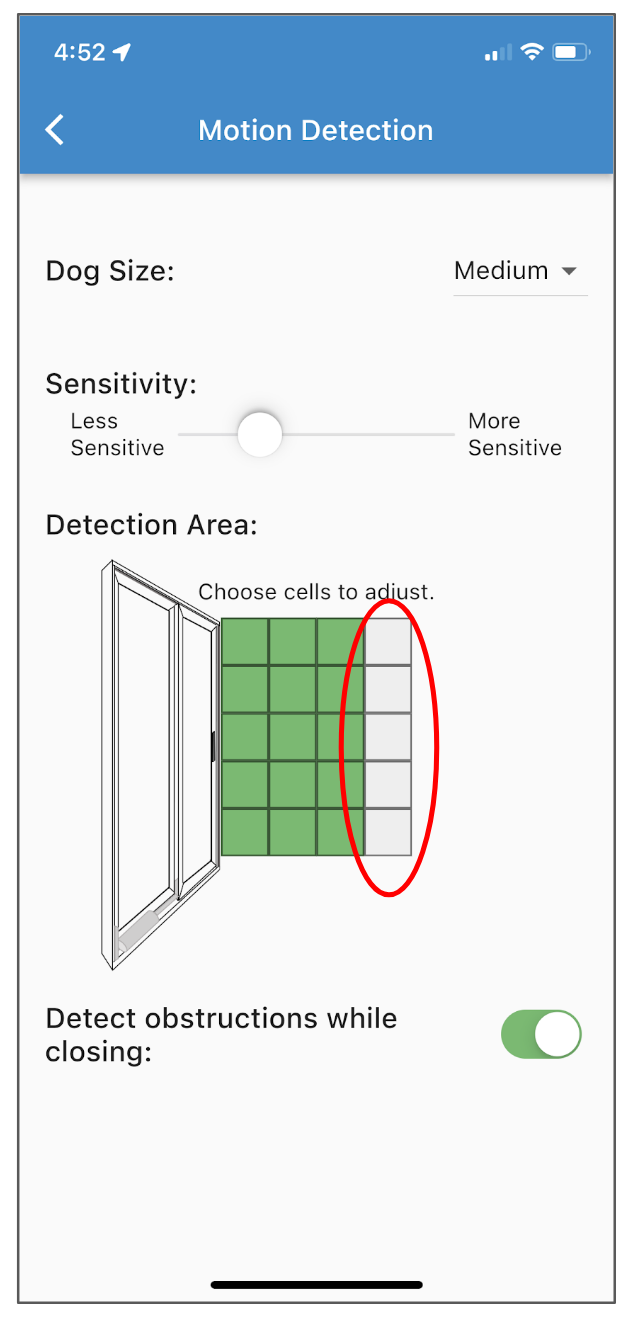
The Detection Area setting controls the size and position of the field of view of the motion detector. By default, all cells in the grid are active, which is signified by the color green. When heat is detected in an active cell it turns orange. This feature allows you to step in front of the door opening and observe which cells detect heat (turn orange) in real time.
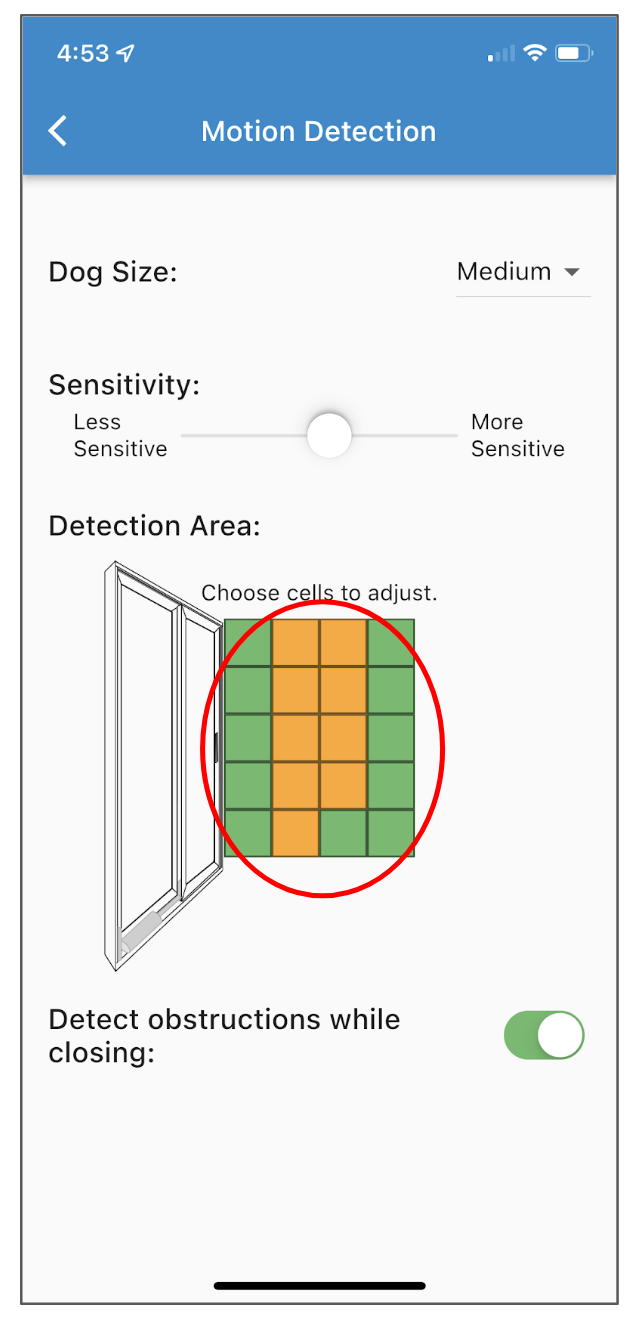
For most households, motion detection will work well with all cells of the grid enabled. If there is a need to reduce the field of view, as in a highly trafficked area, you can deactivate the cells farthest from the door while retaining motion detection immediately in front of the door. To deactivate a cell, touch it and allow it to turn white. Deactivated cells that detect heat turn gray, but don't cause Wayzn to respond.
Detect obstructions while closing
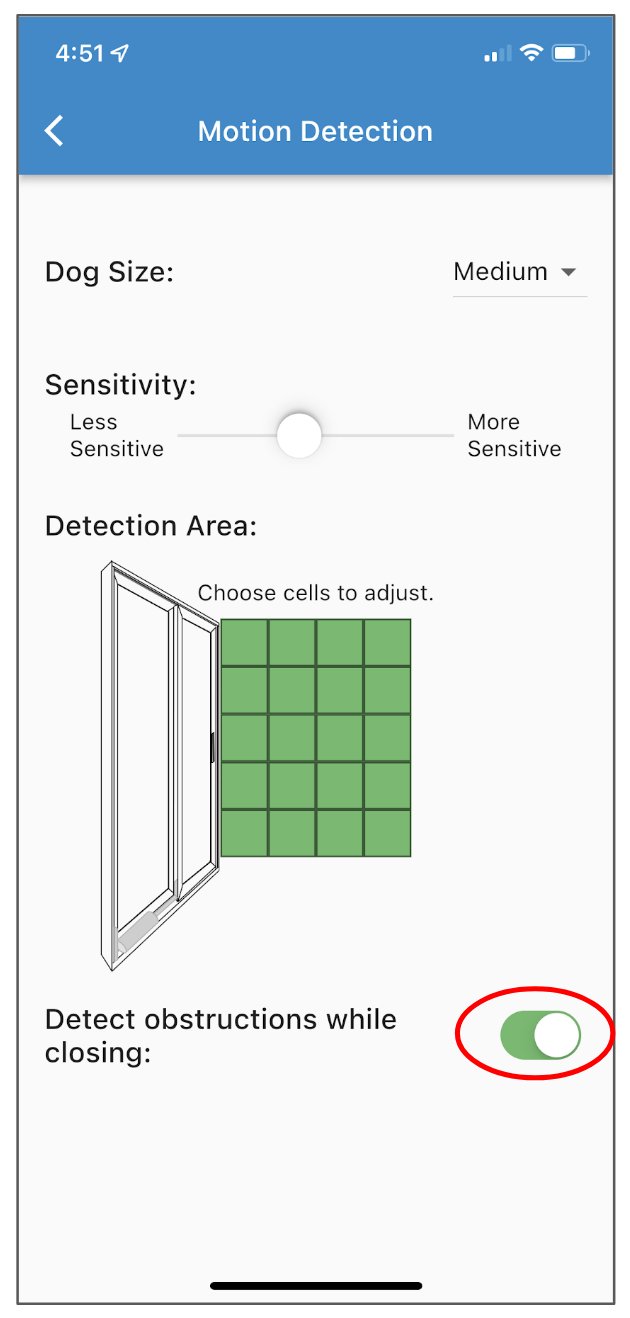
By default, the Smart Pet Door uses the motion detector and your motion detection settings to detect heat in the doorway while the door is closing. When the "Detect obstructions while closing" feature is enabled, if the device detects heat while closing it will stop closing and retract, then wait until heat is no longer detected before closing the door.
Important Note: When this feature is disabled, the door must physically make contact with an obstructing object in order to detect it. Leaving this feature enabled will reduce the risk of injury and for this reason, it is highly recommended to leave it enabled.
Once you have the motion detection settings configured to your liking you must still take additional steps to enable automation on the Device Settings page.
Let's do that now. Continue to the next article:
Adjust the settings to control your Smart Pet Door